How to Crochet for Absolute Beginners: Step-by-Step Guide (Part 1)
Crochet looks complicated when you watch someone else do it, but it is built on a handful of simple movements repeated again and again. If you can tie a knot and hold a pencil, you can learn to crochet. This guide on how to crochet for beginners takes you from zero to a finished practice square, one small skill per step, with a diagram for every step.
This is Part 1 of our beginner series. In one sitting of about 30 to 45 minutes you will learn the slip knot, the chain, the single crochet, turning, fastening off and weaving in ends: everything you need to make a real fabric. Part 2 adds the taller stitches.
What you need to start
You don't need much, and none of it is expensive.
| Supply | What to choose | Why |
|---|---|---|
| Hook | 5 mm (US H-8) | A medium size that is easy to see and handle |
| Yarn | Smooth worsted / aran weight, light colour | You can see every stitch clearly |
| Scissors | Any small pair | To cut the yarn at the end |
| Tapestry needle | Large eye, blunt tip | To weave in the yarn tails |
| Stitch markers (optional) | Or small safety pins | To mark the first stitch of a row |
Avoid dark, fluffy or very thin yarn for your first attempts. They hide your stitches and make it hard to see what you are doing. Our hook size and yarn chart helps you match yarn and hook.
Step 1: Hold your hook and yarn
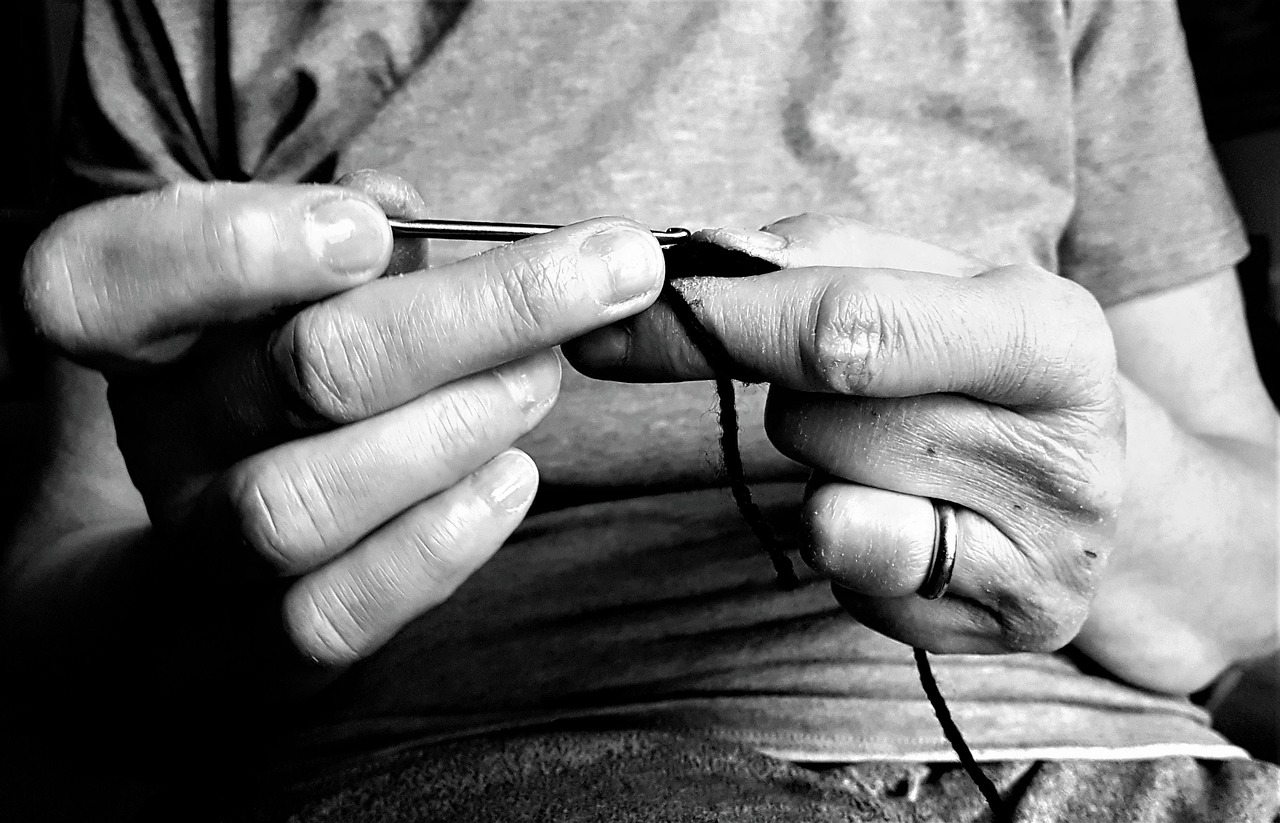
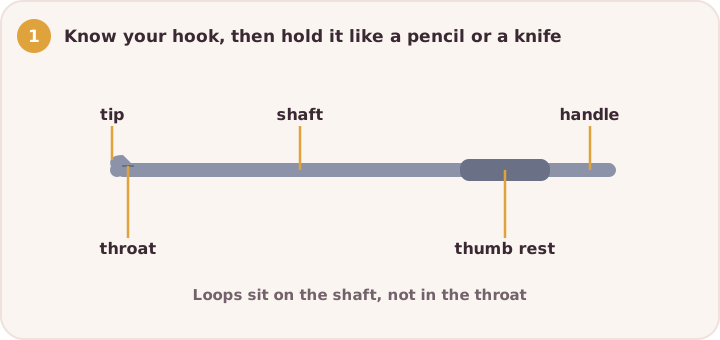
Hold the hook like a pencil or like a knife (both are fine), and let the yarn run over the index finger of your other hand to control the tension. If this is new to you, read our full guide on how to hold a crochet hook and yarn first.
Step 2: Make a slip knot
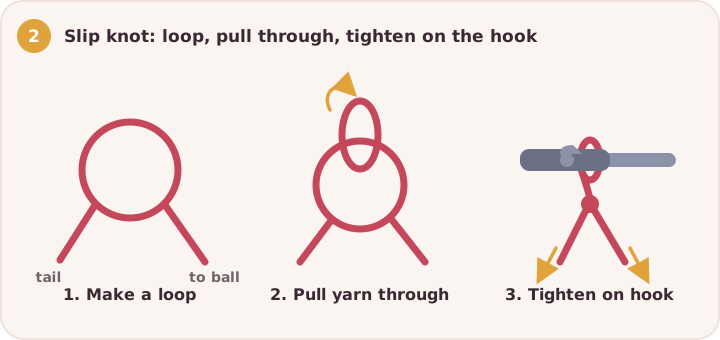
Every project starts with a slip knot on your hook.
- Make a loop with the yarn, crossing the tail end (the short end) over the working yarn (the end attached to the ball).
- Push a small bit of the working yarn through the loop from behind, creating a new loop.
- Put this new loop on your hook and gently pull both ends to tighten it.
The knot should slide on the hook but not be loose. If you pull the tail and the loop gets smaller, you have done it right.
Step 3: Make a foundation chain
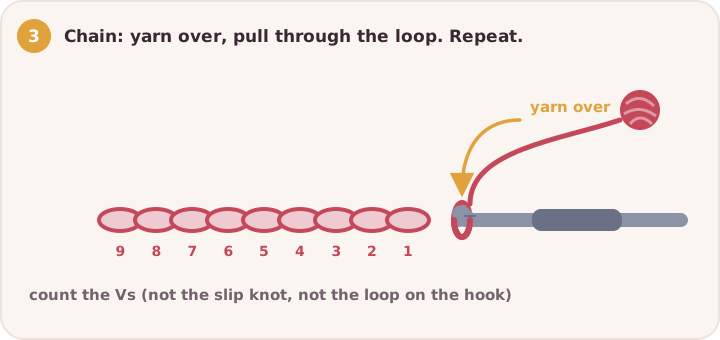
The chain is the base of most crochet projects.
- With the slip knot on your hook, wrap the yarn over the hook from back to front. This is called a yarn over (abbreviated yo).
- Pull the hook back through the loop already on it, catching the yarn. You have made one chain (ch).
- Repeat until you have 16 chains.
Count the chains by looking at the little "V" shapes along the front. Don't count the slip knot or the loop on your hook.
Tip: beginners often chain too tightly. Keep your chains relaxed, as you will need to insert your hook into them on the next row.
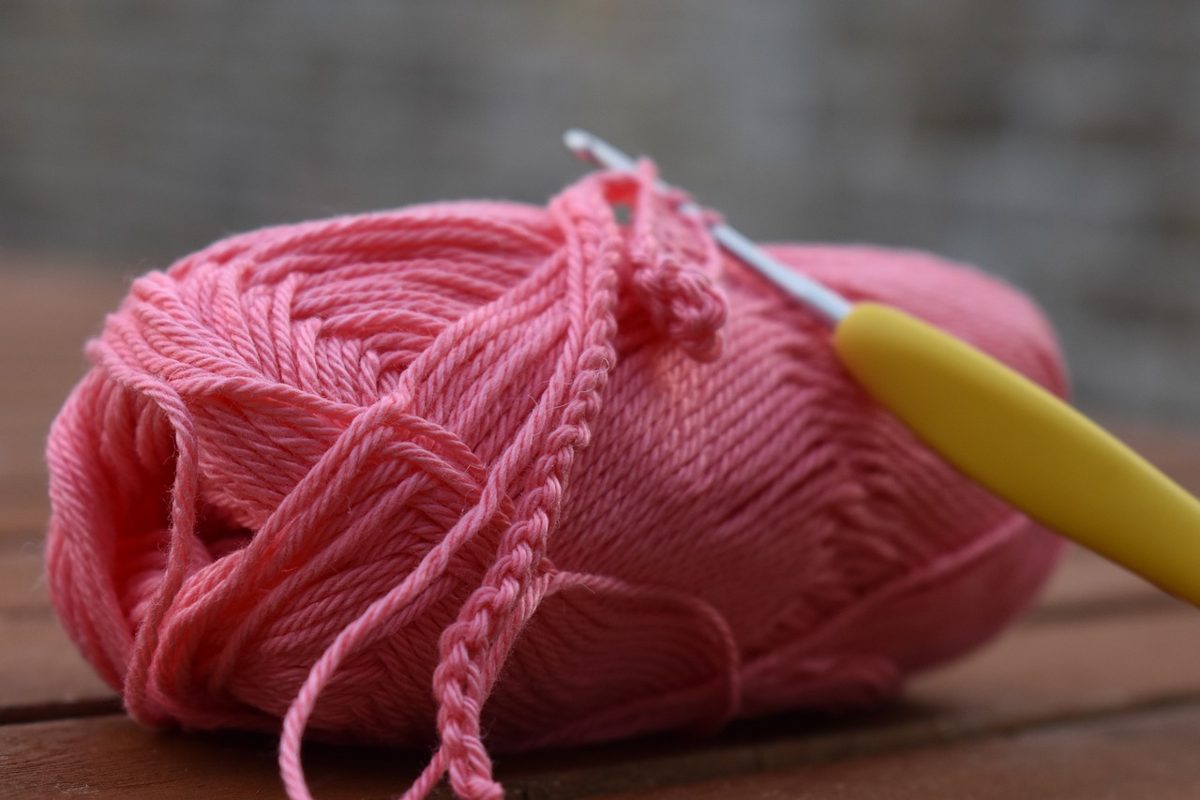
Step 4: Your first row of single crochet
Single crochet (sc) is the most basic crochet stitch. In UK terms it is called double crochet (dc). This difference catches many beginners, so see our US vs UK crochet terms guide if you follow British patterns.
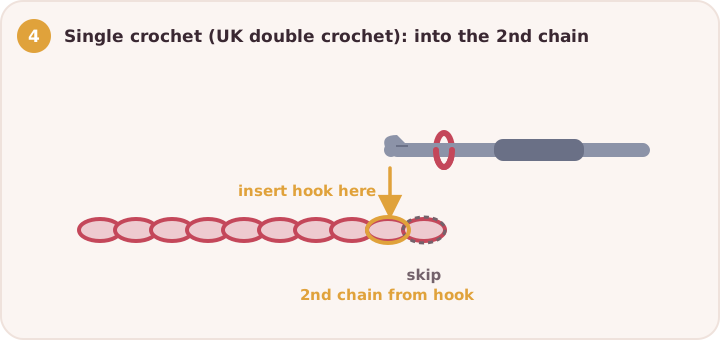
- Skip the first chain next to your hook.
- Insert your hook into the second chain from the hook.
- Yarn over and pull up a loop. You now have two loops on the hook.
- Yarn over again and pull through both loops. One single crochet is done.
- Work one single crochet into each remaining chain to the end.
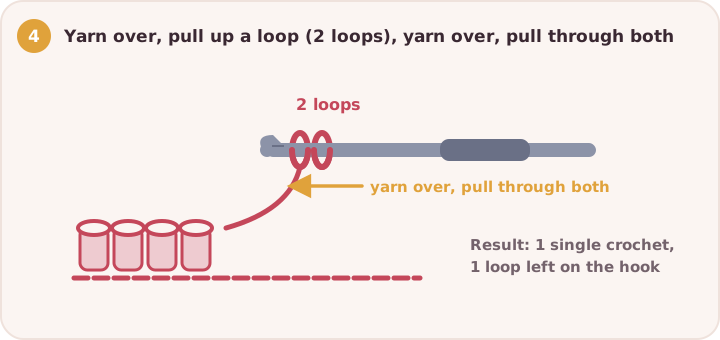
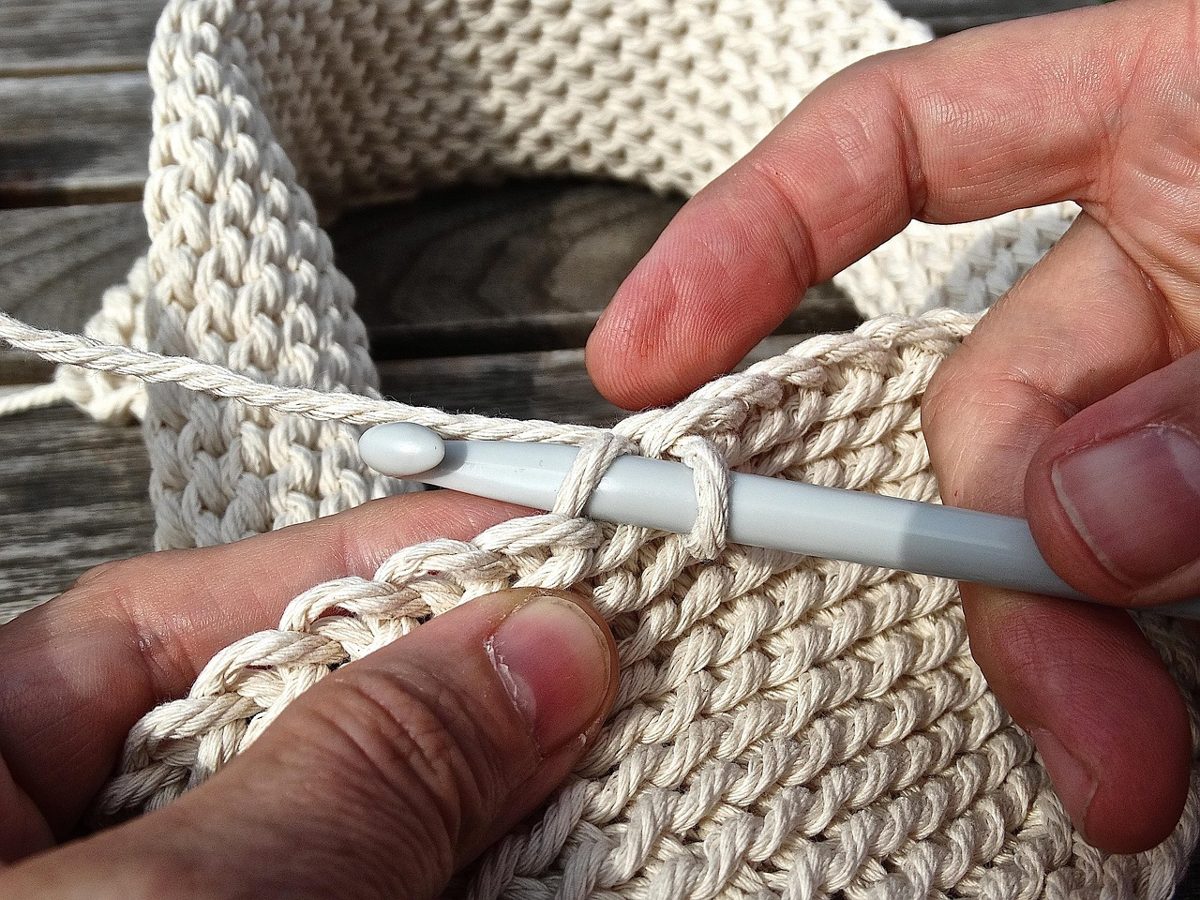
You should have 15 stitches, one less than your chain because you skipped the first chain.
Step 5: Turn and work the next rows
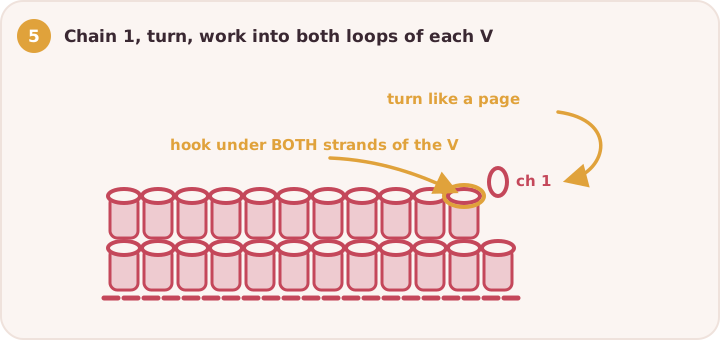
- At the end of the row, chain 1. This is the turning chain, which brings your yarn up to the height of the next row. In single crochet it does not count as a stitch.
- Turn your work over, like turning the page of a book.
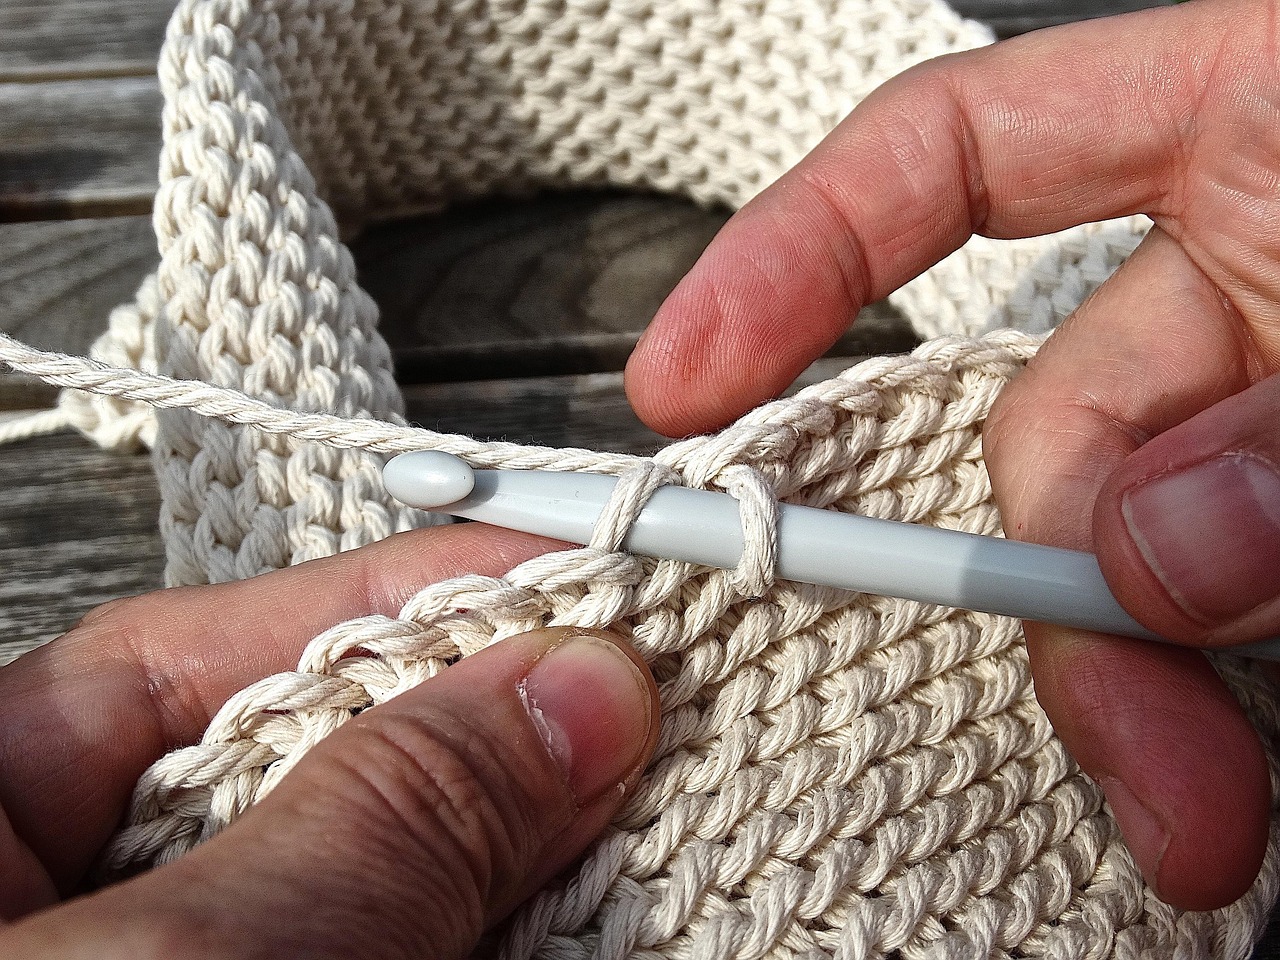
- Work one single crochet into each stitch of the previous row. Insert your hook under both loops at the top of each stitch (the little "V").
- Repeat until your piece is roughly square, about 15 to 20 rows.
Count your stitches at the end of every row. If you have more or fewer than 15, you have added or skipped a stitch. That is the most common beginner mistake, and counting catches it early.
Step 6: Fasten off
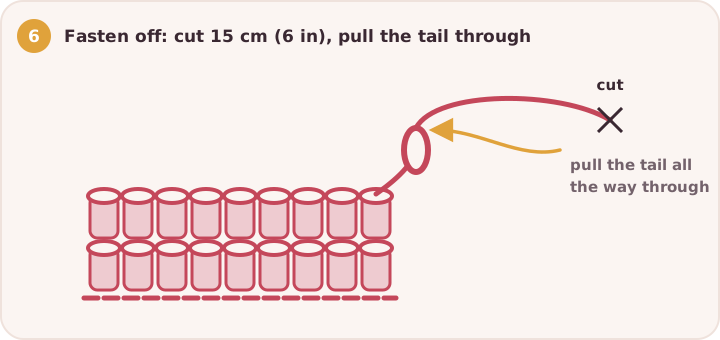
- After the last stitch, cut the yarn, leaving a 15 cm (6 in) tail.
- Yarn over and pull the tail all the way through the loop on your hook.
- Pull gently to tighten. Your work is now secure.
Step 7: Weave in the ends
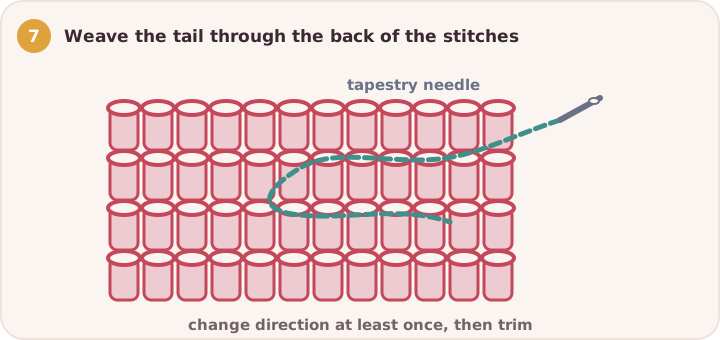
Thread each yarn tail onto your tapestry needle and weave it through the stitches on the back of your work, changing direction once or twice. Trim what's left. Your first crochet square is finished!
Common beginner problems
My work is getting wider or narrower. You are adding or missing stitches at the edges. The first and last stitches of each row are easy to miss. Place a stitch marker in the first stitch of every row.
My stitches are too tight. Relax your yarn hand, and make sure the loops sit on the thick part of the hook (the shaft), not the narrow throat.
My edges look wavy. This is usually inconsistent tension. It improves with practice, so keep going.
I can't tell where to put my hook. Look for the "V" shape on top of each stitch. Your hook goes under both strands of the V unless the pattern says otherwise.
What to make next
Once your practice square looks even, you are ready for a real project. Good next steps:
- Learn the other basic crochet stitches: half double and double crochet.
- Try a granny square, the most popular beginner motif.
- Make a dishcloth or a set of coasters, ideal first gifts (see our easy Christmas gift ideas).
Quick recap
- Slip knot on the hook.
- Chain 16 (yarn over, pull through).
- Single crochet (UK double crochet) into the 2nd chain from the hook and every chain after it: 15 stitches.
- Chain 1, turn, single crochet into every stitch. Repeat for 15 to 20 rows.
- Fasten off and weave in both tails.
Next lesson: Part 2
You now know the shortest stitch. In Part 2, learn the taller ones (half double, double and treble crochet) and how their turning chains work in our guide to basic crochet stitches.
Frequently asked questions
Is crochet easier than knitting? Many people find crochet easier to start because you only work with one loop at a time on a single hook, so dropped stitches are rare and mistakes are easy to undo.
How long does it take to learn to crochet? Most people can make an even practice square after two or three short sessions. Within a few weeks of regular practice, you can finish simple projects like scarves and dishcloths.
Can I teach myself to crochet? Yes. Written guides like this one, combined with patience and regular short practice sessions, are enough for most self-taught crocheters.
Key takeaways
- Start with a 5 mm hook and smooth, light-coloured worsted / aran yarn.
- Slip knot → chain → single crochet → turn: these four steps make a whole fabric.
- US single crochet is the same stitch as UK double crochet.
- Count your stitches on every row to keep your edges straight.